It could well have been a scratch on your cheek.
Nothing can be more disappointing than a visible scratch on your polished wood flooring.
A white clear scratch has the potential to spoil the décor of the house.
So, be a cleanliness warrior, get down and dirty with scratch repair.
Your floor is vulnerable to scratches and damages from many sources.
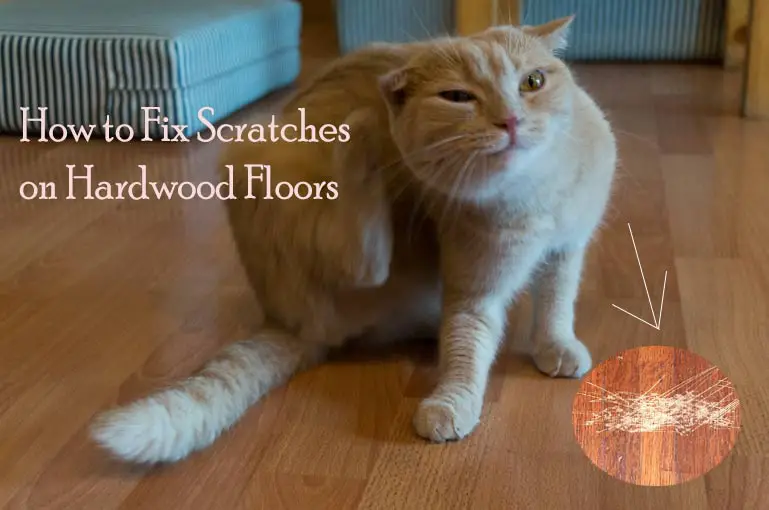
Your pet may scratch away at a spot with enough vigor to harm it. Or it may be an overused part that scrubs away the topcoat.
Maybe heavy furniture movement caused the scrapes. Or a child may inadvertently drop colored liquid leading to spots on the wood.
Just as there are multiple issues, there are many solutions. This guide will tell you easily doable steps to get scratches off hardwood floors.
Knowing Your Floor
It is very important to know the finish on your wood floor.
A hardwood floor may be made of oak – red or white, cherry, maple, white ash, pecan, or hickory. These would have been finished with one of the following.
- Water-based polyurethane
- Oil-based polyurethane
- Varnish
- Stain
- Wax coating
- Aluminum oxide coating
Some floors and surfaces may use more than one product. The finishing depends on the surface, the quality of wood and the level of finish you need.
Checking the Extent and Level of Scratch
If it is a superficial or small scratch, you can cover it in a jiffy. If it is deeper or longer, get hold of some materials before you start. Let us look at all the convenient methods possible.
For a minor surface scratch
This means it is a light graze on the floor finish.
- If it is a very thin, small mark, use crayons or a sharpie pen to cover up the mark.
- If that does not conceal the scratch, get a wax stick. These stain markers contain wood stain as well as urethane. The color may not match, but for a very small, fine mark, it may not matter.
- If the light scratches are visible, make a homemade wood polish.
You would need olive oil and apple cider vinegar in equal parts. Clean the dust from the scratched area. Use a rag to rub the mixture on the surface and let it stay for 24 hours. Wipe it off later and buff.
Repeat this till the scratches are no longer visible.
- If the scratch looks like a light-colored mark on your floor, you need a hardwood floor touch up pen or a blending pencil. Just make sure this convenient tool matches the color of your floor.
- If the light scratches are distributed over a large surface area, consider buying a finish restorer. This will successfully resolve the scuff marks from wood floor since the wood is not damaged.
For a major scratch
It means that the scuff is bigger without damaging the wood, but the finish has come out in the area.
The most effective steps are:
- Remove dust and remains from the area. Cleaning well is absolutely necessary. Wipe off with a cleaner meant for hardwood. You may use oxygenated floor cleaners. Make sure that no wax, pastes or shining material remain on the area.
- Next, you need to sand the area. Use a fine grade steel wool for the process. Rub along the grain and not across. Rub only on the affected area. You may want to feather near the edges to smooth it down. Do so lightly, so that the mark doesn’t get bigger or more noticeable.
- For a real wood floor, sanding will buff out scratches. But for blended wood, engineered wood or bamboo, this will not work.
- You can use a wax stick followed by paste wax. Buff between the two processes. Buff with a soft cloth. Repeat the paste wax and buffing process if needed. This wax paste may not work effectively on a polyurethane floor.
- If you can get polyurethane, use that instead of paste wax to get a glossy finish. Blend with the surrounding wood by lightly buffing with a cloth.
- Alternately, instead of a wax stick, get a wood stain. After sanding and buffing the area, rub the stain on the mark with a soft rag. Wipe it off. Repeat and let sit for a day. Finish with polyurethane gloss. This method works great for mild grazes.
For a deep gouge
This type of scratch has damaged the wood below the finish usually with a cat scratching floor or made by dragging heavy appliances and furniture.
Let’s look at all the options.
- You need to start by cleaning the area. Remove debris, dust, mop and wipe with an oxygenated floor cleaner.
- Next, you would sand the area along the grain of the wood – never across the grain. Buff around the edges.
- After that, fill up the gash. You have the option of using colored wood putty or a wood filler. A wood filler takes to stain better, so is a better option for scratch filling. Fill in using a plastic putty knife. Then you will avoid any further accidental scratch.
- Wipe off any excess filler. Let set and dry.
- After the filler is dry, sand lightly and buff.
- Seal with a coat of polyurethane layer.
- For finer gauges, fill floor color marker resin into the crack. Smooth down and let dry for at least two hours before moving to steps e) and f).
- Don’t forget to check the color tint on the normal floor in a non-visible area.
For gouges that are really open gaps
This may have happened due to ageing of the wood planks or really bad impact damage.
Prepare for extra work to remove scratches from hardwood floors in this case.
- Follow the cleaning, mopping, and sanding steps.
- Use colored wood putty.
- Alternately, rip off a narrow strip from some leftover plank and glue it to the area. Buff and coat with the gloss as usual.
These methods work well only if there are a few scratches that you can manage with a little tweak here and there. If there are too many scratches and marks and deep damages, it is best to leave it to the professionals. Also if the area is large, the wood is old or you are not sure about the wood or the finish, leave it for professionals to figure out.
Remember, only pure hardwood can sustain multiple sanding and buffing. Engineered wood can stand sanding once or twice. So a professional will know how to treat your hardwood floor scratch repair.
Unique Ideas to Remove Marks from Hardwood Floors
Here are some handy, quick tips and some exceptional ideas to remove various kinds of wood marks.
- Scuff marks: Here is a quick tip to remove scuff marks from wood floors that may have been caused by dirt from shoes. Vacuum and clean the area from any dirt. Buff using a tennis ball. Take a tiny amount of toothpaste and rub it on the area with a wet cloth. Alternately, rub the area with a ‘magic eraser’.
- Black/Dark marks: There are a few ways to handle this issue. To get black marks out of hardwood floors, catch them quick. The sooner you attack the issue, the better will be the result.
Start by rubbing the area with a damp cloth. If the stain remains, use some spirit poured into the cloth and rub again.
If that doesn’t work either, get some hydrogen peroxide. Soak a cloth in the liquid and dab the stains and spots. Leave overnight. If the spots look too stubborn, leave the hydrogen peroxide soaked cloth on the mark overnight.
- Scratches on furniture: Invest in a good furniture scratch cover if you have wooden furniture. Many well-reputed companies have products in various colors and shades. They work as concealers and cover-up any ugly marks on your décor pieces. You may buy them in combo packs with wax-removers that you must use before applying the concealer.
- Concealers and removers for the floor: It is always a good idea to repair a small damage rather than waiting for it to start showing. For slight scratches or light smudges, buy and store wood floor scratch remover of the color tint of your floor. This will come in handy when you have minute scratches.
Avoiding Scratches on Hardwood Floors
There is no doubt that refurbishing the interiors and refinishing the wood floors can be time-consuming and expensive. Yet you cannot live with scratches and marks on the flooring or gear. There is a two-pronged approach if you don’t want to have scratches on your wooden floors and furniture.
The first step is to prevent the wood from damages.
- If possible train the kids and pets to keep away from using sharp toys. Clip your pets’ nails. Be vigilant about kids playing with marker pens and rocks.
- Keep the floor clean of debris and other stuff that may cause scratches.
- Lay out rugs, mats, runners and carpets in the areas of maximum use and movements. Train people at home well.
- Avoid sliding large equipment and heavy boxes.
- Consider taking off shoes before stepping on the wood floor.
The second step is looking for ways to protect your hardwood floor. Plan your furniture accordingly.
- Ask the experts if your floor needs an extra coating of polyurethane. Try to get a screen and recoat done every 3 to 4 years to avoid scratches.
- Add felt pads to chair legs and drag the chairs without any scratches. Have extras handy if those fall off.
- Consider buying office chair caster wheels for all your chairs. Then you won’t be dragging the chair legs on the floor.
- Buy a vacuum cleaner meant for hardwood floor as against the usual carpeted floor machine.
- Consider using rug pads under your rugs to reduce the chances of slipping and floor marks.
In the long run, you would find that these small steps and changes around the house will pay off.
After all, it is better to avoid scratches than to remove scratches from the hardwood floor and other wooden stuff.